Honey Butter Dinner Rolls
Soft and fluffy dinner rolls infused with sweet honey and topped with homemade honey butter right after baking. They’re absolutely a must for your dinner menu!
Yield 15 rolls
Ingredients
Dough
- 1 cup (240ml) whole milk (warmed to 110-115°F)
- 1 (0.25oz) package (7g) or 2 1/4 teaspoons Platinum Yeast
- 1/2 teaspoon granulated sugar
- 1/4 cup (84g) honey
- 1 large egg
- 1 large egg yolk
- 1/4 cup (60g) unsalted butter, melted and slightly cooled
- 1/2 teaspoon salt
- 3 1/2 cups (452g) bread flour
Topping
- 1/4 cup (60g) unsalted butter, very soft
- 2 tablespoon (42g) honey
Instructions
- Prepare the dough: Whisk the warm milk, yeast, and 1 teaspoon honey together in the bowl of your stand mixer. Loosely cover and allow to sit for 5–10 minutes until foamy and frothy on top. *If you do not own a stand mixer, you can do this in a large mixing bowl and in the next step, mix the dough together with a large wooden spoon/silicone spatula. It will take a bit of arm muscle. A hand mixer works, but the sticky dough repeatedly gets stuck in the beaters. Mixing by hand with a wooden spoon or silicone spatula is a better choice.*
- With the stand mixer running on low speed with the dough hook attachment, add the remaining honey, egg, egg yolk, melted butter, salt, and 3 cups of flour. Mix on low speed for 1 minute, then add remaining 1/2 cup of flour. Mix on low speed for 1 minute as it all combines. The dough should be thick, yet soft, and just slightly sticky. It should pull away from the sides of the bowl as it mixes. When it does, it is ready to knead. If, however, the dough is too sticky to handle, mix in more flour, 1 Tablespoon at a time. Make sure you do not add too much extra flour; you want a soft, slightly sticky dough.
- Knead the dough: Keep the dough in the mixer and beat for an additional 8-10 full minutes, or knead by hand on a lightly floured surface for 8-10 full minutes. If the dough becomes too sticky during the kneading process, sprinkle 1 teaspoon of flour at a time on the dough or on the work surface/in the bowl to make a soft, slightly tacky dough. Do not add more flour than you need because you do not want a dry dough. After kneading, the dough should still feel a little soft. Poke it with your finger—if it slowly bounces back, your dough is ready to rise. You can also do a “windowpane test” to see if your dough has been kneaded long enough: tear off a small (roughly golfball-size) piece of dough and gently stretch it out until it’s thin enough for light to pass through it. Hold it up to a window or light. Does light pass through the stretched dough without the dough tearing first? If so, your dough has been kneaded long enough and is ready to rise. If not, keep kneading until it passes the windowpane test.
- 1st rise: Lightly grease a large bowl with oil or nonstick spray. Place the dough in the bowl, turning it to coat all sides in the oil. Cover the bowl with aluminum foil, plastic wrap, or a clean kitchen towel. Allow the dough to rise in a relatively warm environment for 1–2 hours or until double in size.
- Grease a 9×13-inch baking pan or two 9-inch square or round baking pans. You can also bake the rolls in a cast iron skillet or on a lined baking sheet.
- Shape the rolls: When the dough is ready, punch it down to release the air. Divide the dough into 15 pieces, roughly 2 ounces or 60g each. (Just eyeball it—doesn’t have to be perfect!) A bench scraper is always helpful for cutting dough. Shape each piece into a smooth ball. Arrange in prepared baking pan.
- 2nd rise: Loosely cover with plastic wrap and allow to rise until doubled in size and puffy, about 1 hour.
- Preheat oven to 350°F (177°C). Bake the rolls for 20–25 minutes or until golden brown on top, rotating the pan halfway through. If you notice the tops browning too quickly, loosely tent the pan with aluminum foil.
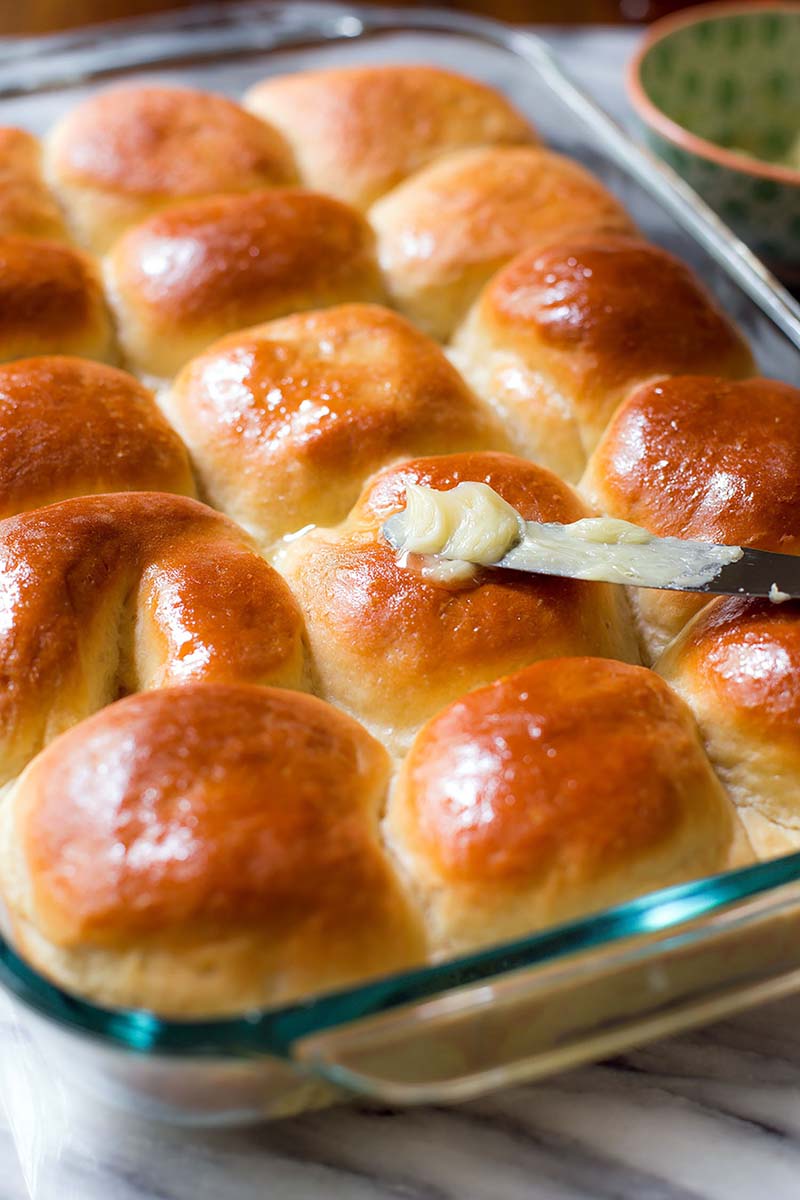
- Make the honey butter topping: While the rolls bake, mix the topping ingredients together to make a creamy honey butter. Remove the rolls from the oven when they are done and spread a generous amount of honey butter onto each warm roll. Serve with any remaining honey butter.
- Cover leftovers and keep in the refrigerator for up to 1 week or freeze for up to 3 months, then thaw overnight in the refrigerator. Warm up in a 300°F (149°C) oven for 10 minutes.
Notes
- Freezing Dough Instructions: Prepare recipe through step 6. Place shaped rolls in a greased baking pan, cover tightly, and freeze for up to 3 months. Once frozen, the dough balls won’t stick together anymore, and you can place them in a freezer bag if needed. On the day you serve them, arrange the dough balls in a greased baking pan, cover tightly, then let them thaw and rise for about 4–5 hours. Bake as directed. You can also freeze the baked dinner rolls. Allow them to cool completely, then freeze for up to 3 months. Thaw in the refrigerator or at room temperature, then reheat as desired. If reheating the whole pan, lightly cover and reheat in a 300°F (149°C) oven for about 10 minutes or until warm.
- Overnight Dough Instructions: Prepare the recipe through step 6. Cover the shaped rolls tightly and refrigerate for up to about 15 hours. At least 3 hours before you need them the next day, remove the rolls from the refrigerator, keep covered, and allow to rise on the counter for about 1–2 hours before baking. Alternatively, you can let the dough have its 1st rise in the refrigerator overnight. Cover the dough tightly and place in the refrigerator for up to about 15 hours. Remove from the refrigerator and allow the dough to fully rise for 2 more hours. Continue with step 5.
- Baking Pan: I prefer baking the rolls in a glass 9×13-inch baking pan because I find they brown a little too quickly in a metal pan. But as long as you bake the rolls on a lower oven rack and keep your eye on them, any pan is great. You can also bake these rolls in a large cast iron skillet, in two 9-inch round or square baking pans, or on a lined baking sheet. Bake time remains the same.
- Milk: Whole milk or even buttermilk are ideal for the best, richest flavor and texture. Keeping that in mind, feel free to substitute with a lower-fat or nondairy milk.
- Yeast: Platinum Yeast from Red Star is an instant yeast. You can use Red Star Yeast active dry yeast instead. Rise times will be slightly longer using active dry yeast. Reference my Baking with Yeast Guide for answers to common yeast FAQs.
- Flour: For extra chewy rolls, I like to use bread flour. You can use all-purpose flour or bread flour. All-purpose flour is convenient for most, but bread flour produces a chewier texture. The rolls are still soft and fluffy no matter which you use. Either flour is fine and there are no other changes to the recipe if you use one or the other.
- Can I Use Whole Wheat Flour? I don’t recommend it for this recipe, but you can replace up to 1 cup (about 120–130g) of flour with whole wheat flour. Expect a denser roll. Or try my honey whole wheat dinner rolls recipe instead.
